Contact
With the help of the contact, the user can store information about a physical / legal person who is not a user of the Simple Business system, but who may need to interact with the Simple Business functions. CREATING CONTACTThere are several ways to create a contact.1. On the top panel of the main window of the program select the item "New" - "Contact". By default, a contact is created in an organization that is focused in the contact tree at the time the function is called;2. Go to the "Personnel" tab of the main program window, use the "Create" - "Contact" item in the context menu of any tree object;3. In the group of contacts in the left pane of the "Information" tab, select the option "Add contact".The window for creating a contact is shown in the figure. 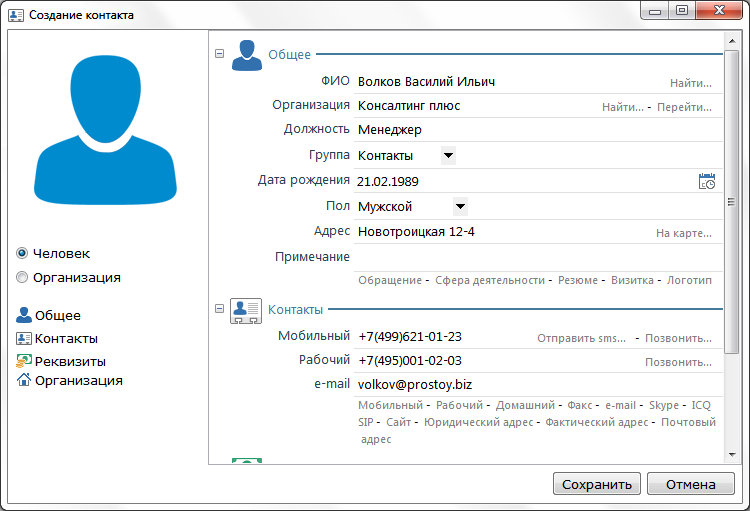 The user can choose to which type of contact the created belongs - the "Individual" option, "Legal entity" in the left panel. For quick access to the desired section of the form, the left panel also provides links: "General", "Contacts", "Requisites", "More". By clicking on the desired link the name of this section will be focused. The program provides a universal set of fields for storing contact information. PROPERTIES OF CONTACTYou can view the contact information in the contact properties window, which opens when you double-click on the contact (Enter). 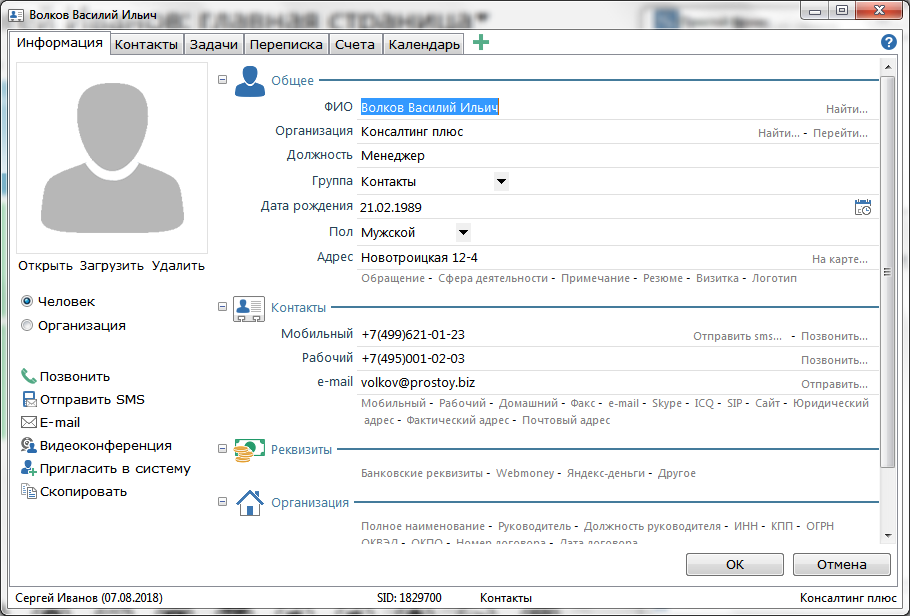 - Information tabThe basic information about the contact is displayed.Opposite the phone numbers there are links "Call ...", by clicking on which the call to the specified number is made. Also opposite the mobile phone number is the link "Send sms" - the window for sending an SMS message to the specified number opens.
In the right corner of the "e-mail" field you can use the link "Send ..." - a window appears for sending the letter to the specified address. In the left panel there are options for contacting the contact: "Call", "Send SMS", "E-mail", "Video conference", as well as the options "Copy" and "Invite to the system." "Videoconference" - opens the window of the user's invitation. After the user is selected, he will be sent an invitation to the videoconference; "Copy" - copies to the clipboard the data that is indicated on the contact form. "Invite to the system" - opens the window of an external user invitation based on this contact, i.e. the corresponding data from the current window (e-mail address and access to the contact) are automatically inserted into the fields. If the contact is a legal entity, then this tab will show all those contacts that are individuals and belong to the same organization as the contact - a legal entity. The list of contacts on the Contacts tab can be generated by the user. For this purpose, the options on the top panel are "Add", "Delete" and "Create" - after creation, the contact is automatically added to the list of nested contacts.Using the drop-down menu of the "Columns" button, you can select which kinds of fields to display on this tab, and which do not.Options on the left panel ("Call", "Send SMS", "E-mail", "Videoconference", "Invite") are intended for communication with the contact highlighted in the list.The Tasks tab This tab will show all the tasks the customer is favored by this contact. Allows the user to leave comments relating to this contact. This tab lists the e-mail messages sent / received by the contact Accounts relating to tasks for which the contact is the customer are displayed. Here, the user can create and view cases related to this contact. In the contact window, the user can add a document, an account, or an existing task. You can add a tab by clicking the "+" button and selecting the desired menu item.
|