Using Document Templates
Add a tab "Documents" in the task window the user can click on the button. This option is available to employees of the organization with appropriate access, as well as the owner and administrator of the organization. 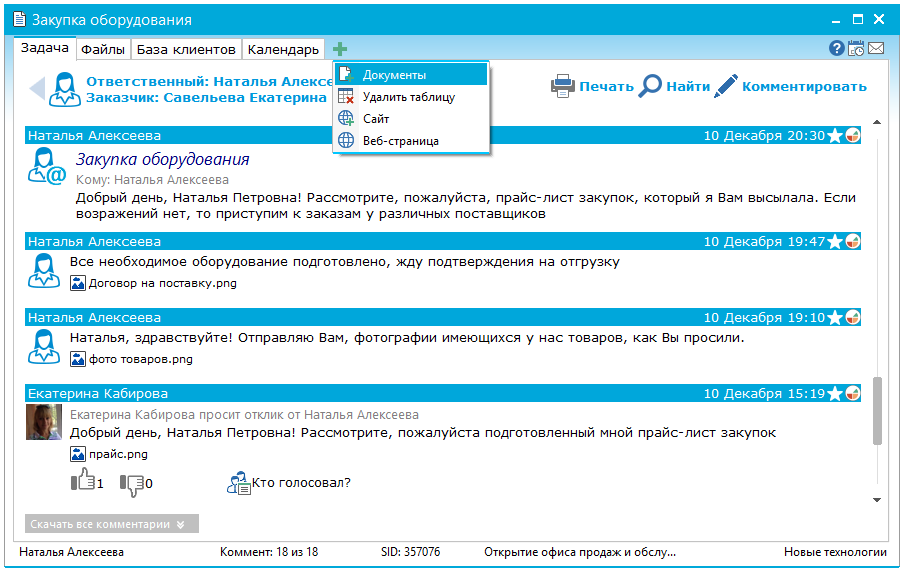 In the task window on the "Documents" tab, the user has the following options: 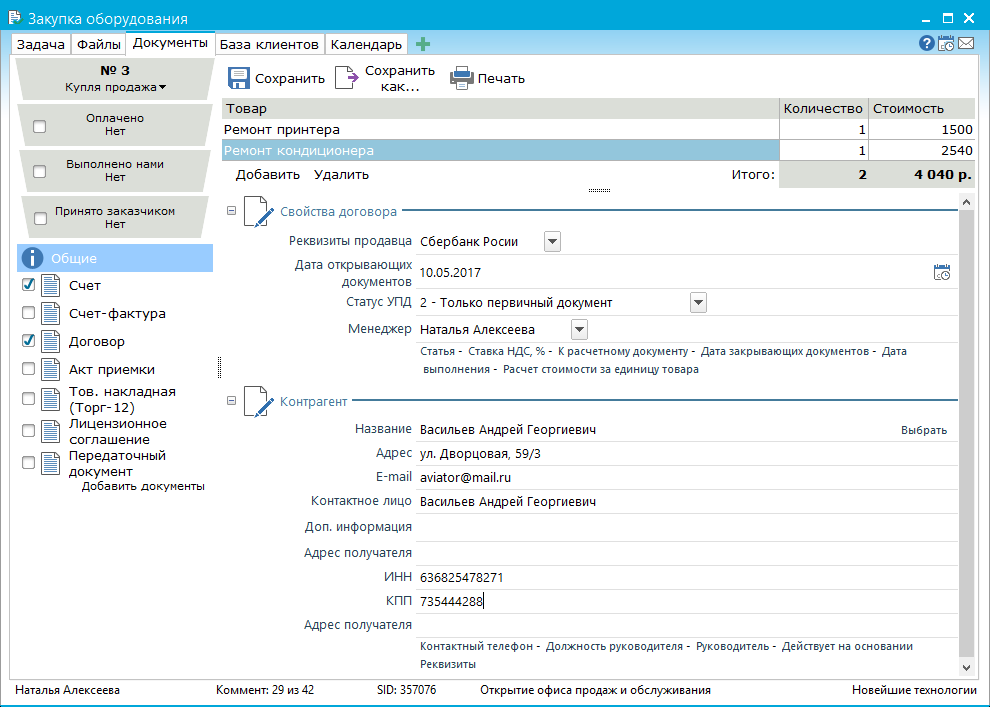 "Document package type" - the user can select from the drop-down list the type of organization documents created by the owner or administrator of the organization; "Document date" - the user can use the calendars to set the date of opening and closing documents; Option "Not paid" - by clicking on this option, you can pay the bill. In the task, a comment is added to the commentary; Option "Closing documents" - when this option is enabled, documents are assigned the status of "Closing documents". In the task, a comment is added to the commentary; "Properties" - this link serves to display the properties (fields) of the document. Below the "Properties" option, all documents that relate to the selected document package type are displayed. "Table of ordered goods and services" - the user can fill in the name, quantity and cost of the ordered goods and services. At the bottom of the table, the total cost of the goods and services entered will appear. Completed data will be automatically placed in the required documents. Fields for filling are document properties. User-filled data is automatically inserted into the document. In order for the entered data to automatically fall into the document, you must import the basic set of fields and use them in the document template. The choice of the customer (counterparty) is made by the button "Customer". In the appeared window the user selects the necessary customer (in the list physical and legal persons will be presented). All information about the customer will be displayed in the "Counterparty" section. Using the button "Export", the user can export (save) one or several documents in .doc or .pdf format locally to their computer. By clicking on the "Save" button, all the completed documents are saved. The user can edit the document by selecting the necessary document in the tree and clicking the "Edit" button or by selecting the "Edit" (Ctrl + Space) context menu function. Filling out the properties of the required document and selecting the document in the list on the bottom panel, on the right you can see what the completed document looks like. The user can return to the document properties by clicking the "Properties" link. 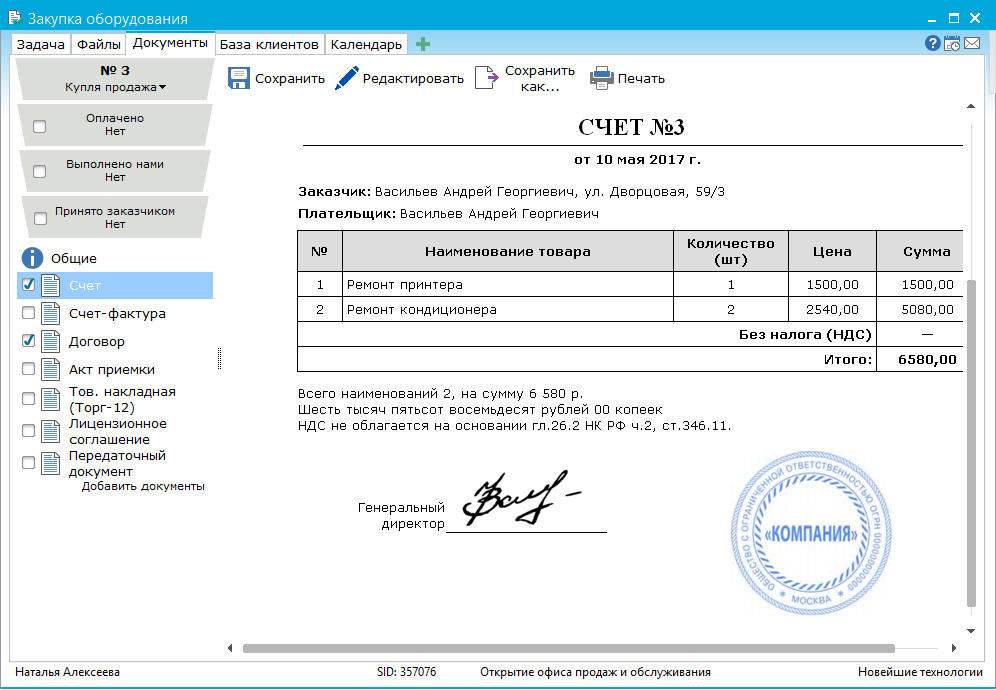 Using the context menu item "Edit Text", you can make edits to the document. 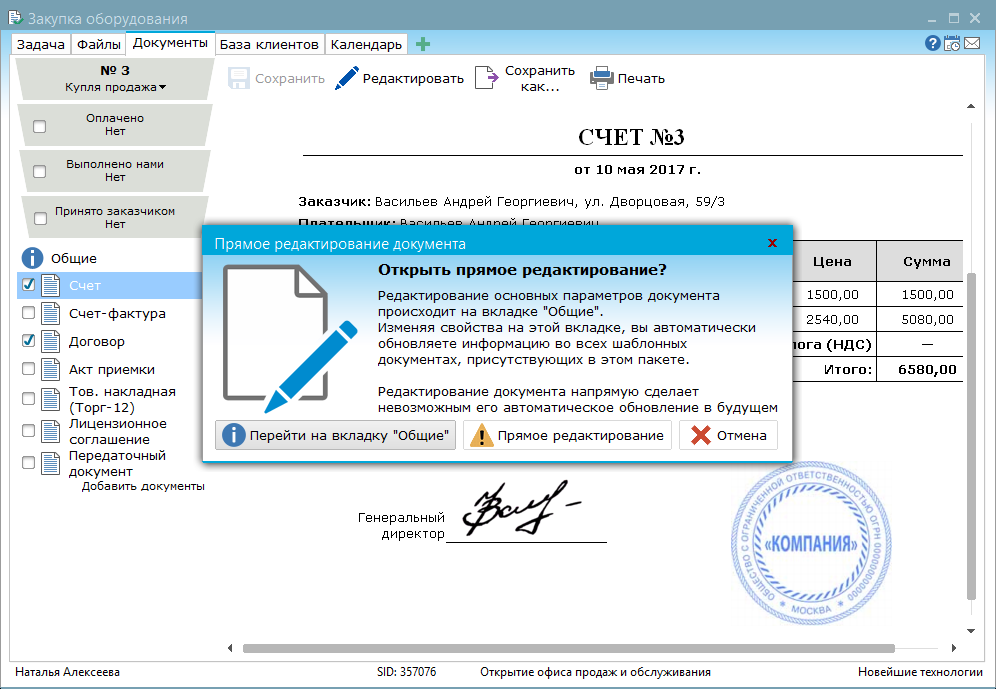 The user can use the following options in the window that opens: - "Go to the" General "tab - the user goes to the fields to fill in the data that is inserted into the documents;
- "Direct editing" - the selected document goes into editing mode. The user can make changes to the document;
- "Cancel" - closes this message.
USING TABLES IN DOCUMENTS If the document template contains several tables, the table data will be displayed in the template on the "Documents" tab, when the properties of the required document are opened. The user can start filling out the tables in the document. 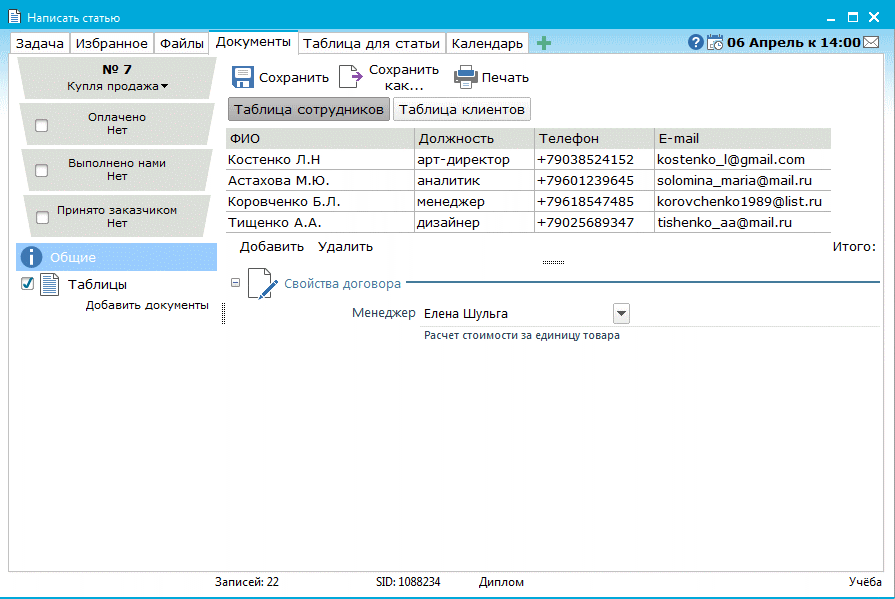 Clicking on the name of the document in the left panel, you can see how the filled template will look. 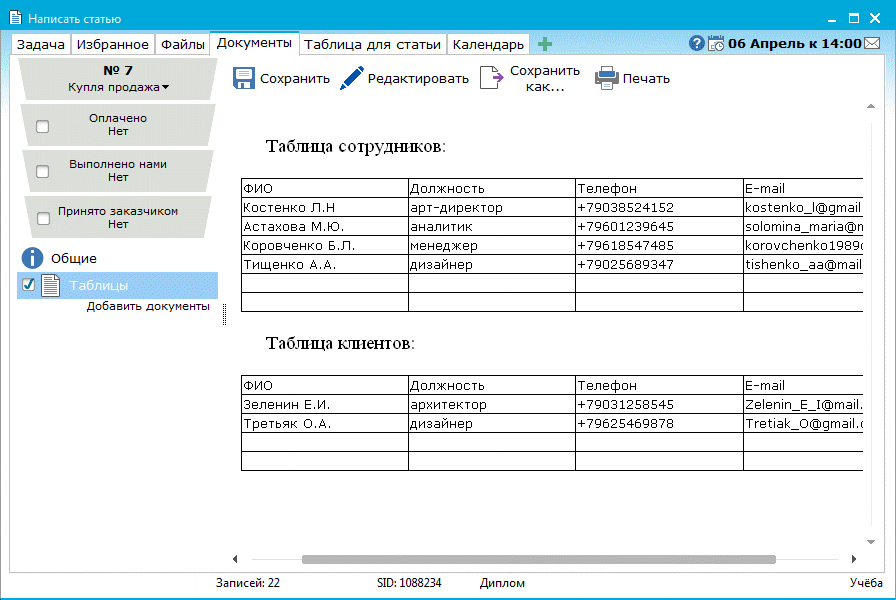 PRINTING DOCUMENTS By clicking on the "Print" button, the user opens the document printing window. 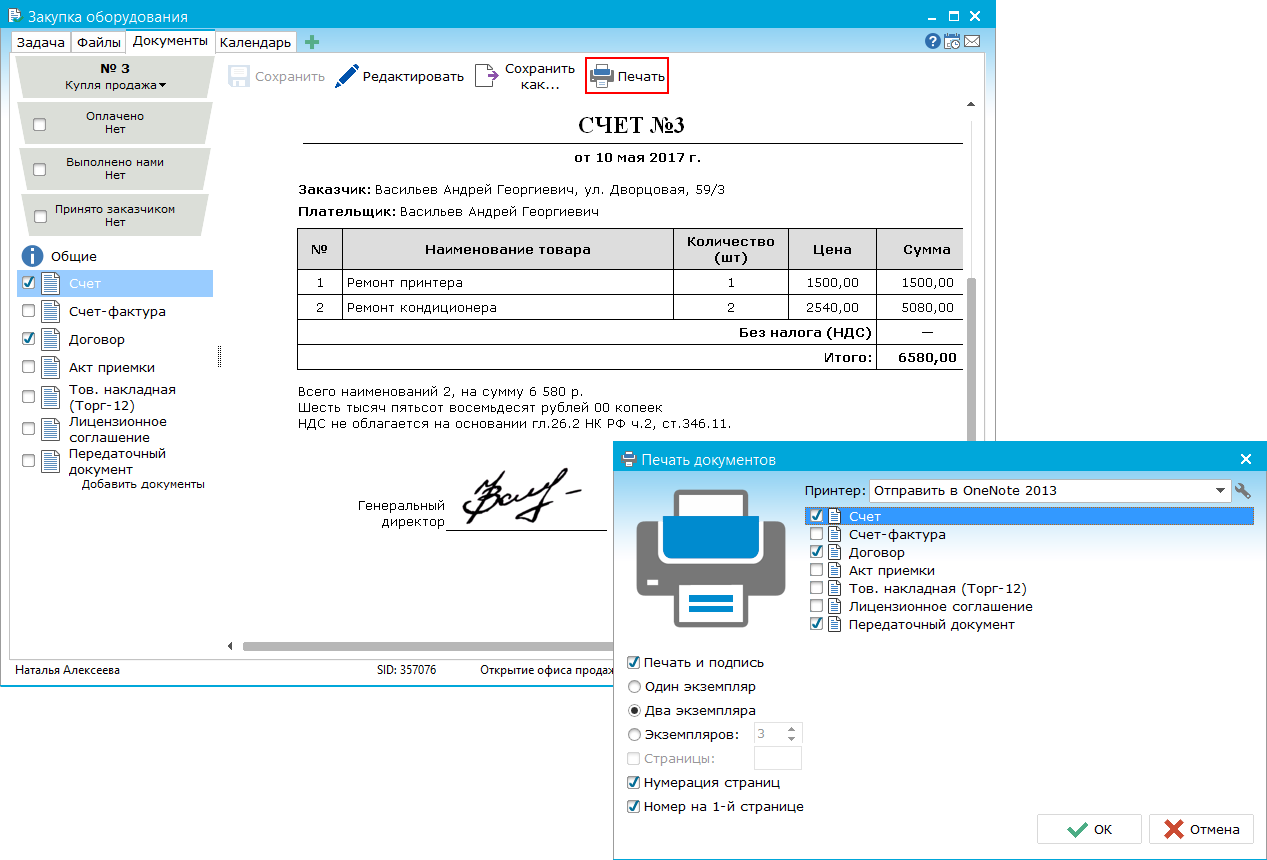 The document printing window displays a list of documents that the user added to the package of documents. The user can mark the necessary documents for printing with the help of dashes. In the left panel, the user has options that allow you to set the number of copies of documents, enable / disable printing of the signature and print in documents, and select the range of pages to print and enable the page numbering option. More fine-tuning of printing of documents is available by pressing the button  . . EXPORT OF DOCUMENTS The user can export document templates by selecting the "Export" option in the context menu of the document or by clicking on the "Save as ..." button. 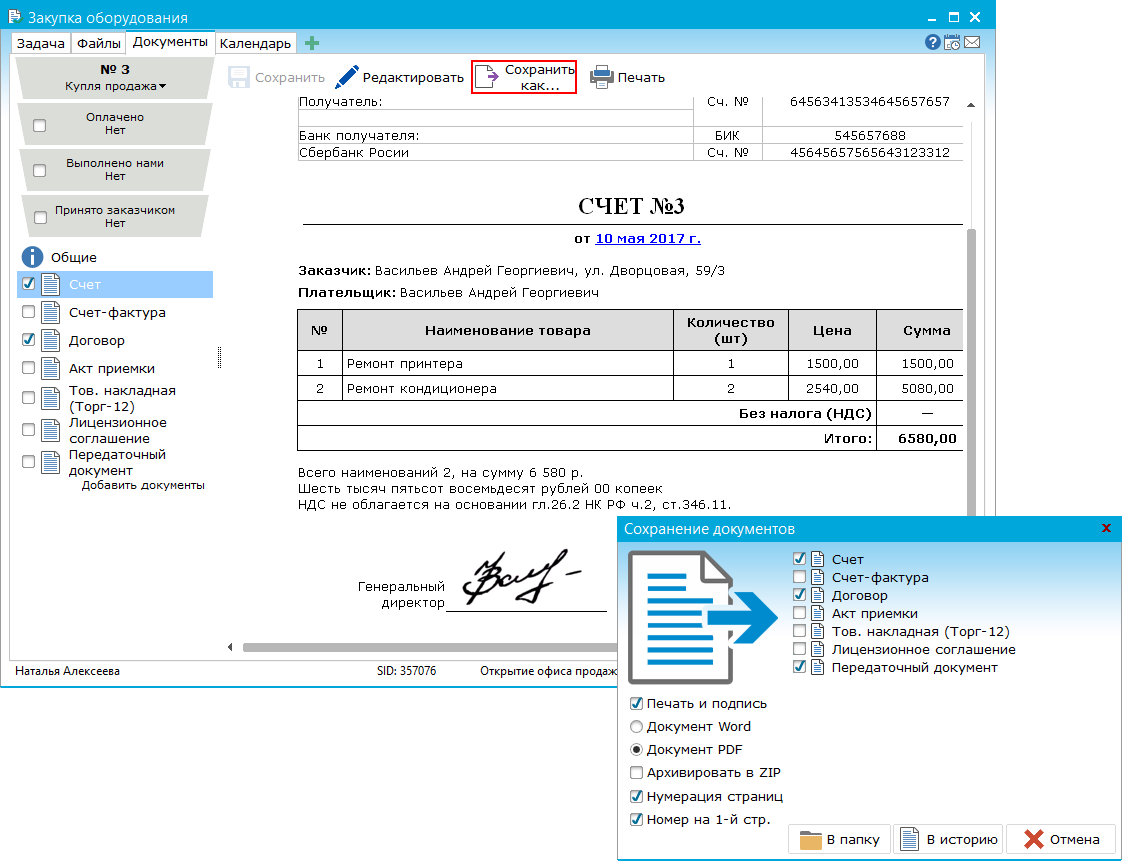 You can export documents in doc or pdf format. For a large number of documents, enable the option "Archive to ZIP". Two types of export are available to you: "In the folder" - in this case, the documents will be saved locally on the PC, or "In history" - the documents will be sent to the task in a new comment. ADDING THE DOCUMENT TO THE PROBLEM In order to add a document to the task, you can also use the "Comment" button at the top right of the task window. Then, using the button "Attach document" in the comment window, select the required document and click on the "Next" button. 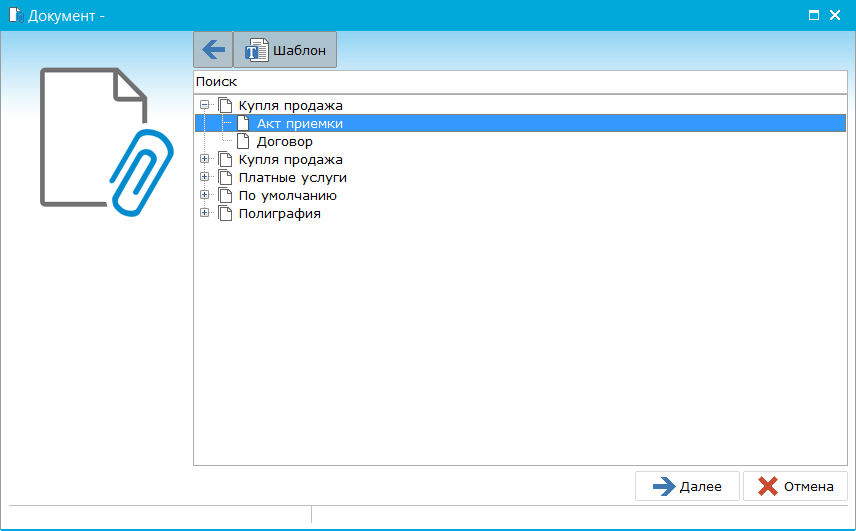 The document is opened for completion. 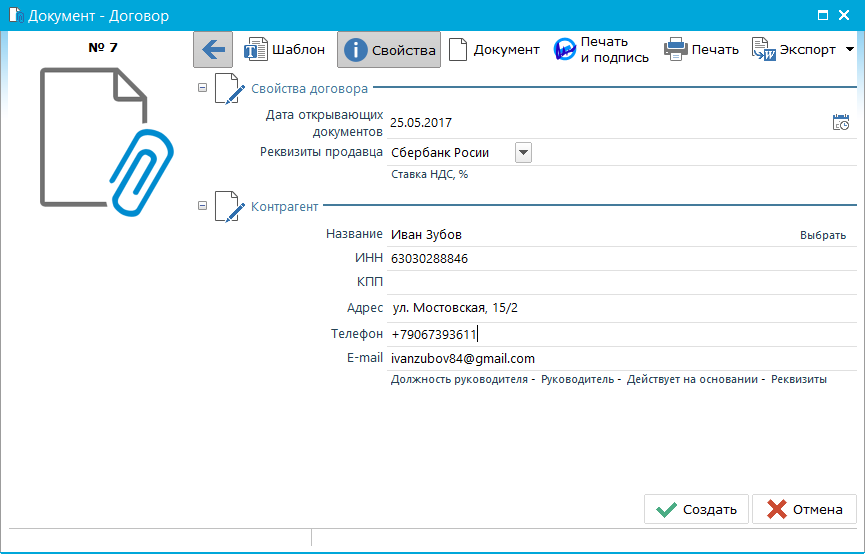 After the document is full, save all changes with the "Create" button. By clicking on the "Cancel" button, the entered data will not be saved.
|