Creating (properties) of the task
You can create a task in several ways: - Use the "Create" -> "Task" item in the main menu of the program;
- On the Projects tab, select the project in which the task will be created and select the Create Task item in the context menu or use the New item in the main program menu. The (Ins) button adds a new task, a shortcut (Ctrl + Ins) - a nested task;
- On the Projects tab, select the task and select New Task from the shortcut menu. Also, the user can create a nested task by selecting the appropriate item from the context menu;
- Select the project in which the task will be created. Double-click on the project to open the project window and click the "New Task" button on the "Information" tab in the bottom panel of the window.
You can create a task in the project by the project author, administrator and users who have the rights to edit the project. The window for creating a new task is shown in the figure. 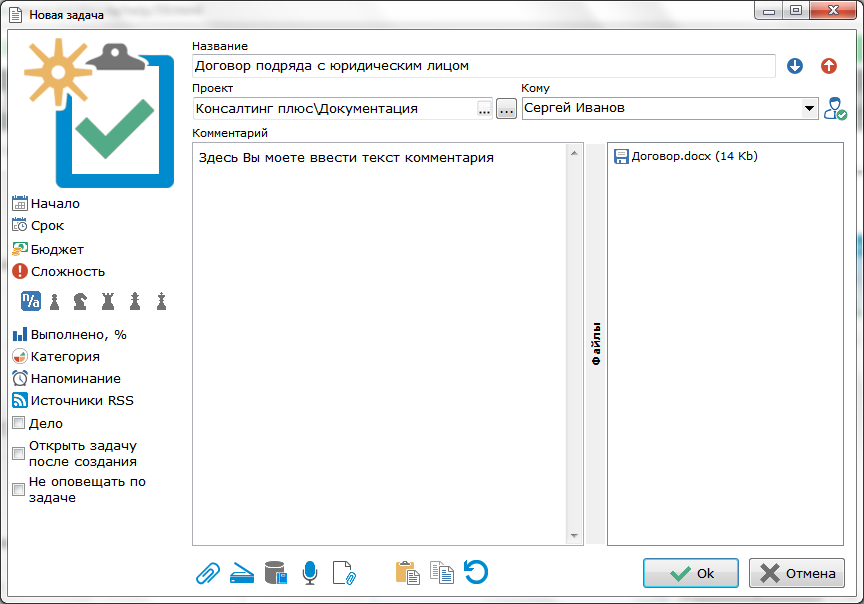 In the "New Task" window the following task properties are presented: TITLE NAMEIn the "Name" field, the user can enter the name of the task. This field is required. THE IMPORTANCE OF THE TASKThe task can be assigned importance. To indicate the importance of the task, use the buttons located in the upper-right corner of the window.  - Low importance of the task; - Low importance of the task;
 - High importance of the task. - High importance of the task.
If none of these buttons is selected, the task is assigned the usual importance. ADDING TASKS TO THE PROJECT OR ANOTHER TASKYou can add a task to the project, or attach it to another project task. In the first case, from the "Project" drop-down list, the desired project is selected in which the task will be placed. This list lists the projects of available organizations in which the user has the right to create new tasks (the project is open to change, the user is the project administrator, the user is the administrator or the owner of the organization). In case the new task needs to be attached to another task, use the button next to the list of projects. In the window that appears with a list of project tasks, the user can select the task in which the created task will be nested. If the project has not been selected, all tasks available to the user will be displayed. RESPONSIBLE FOR THE TASKYou can assign the person responsible for the task by selecting the desired user from the "To" drop-down list or not assigning the person responsible for the task by selecting [no assignment]. To speed up the search for the right person, it is enough for the user to start entering the name in the To field, users will be filtered out according to the entered initial characters in the drop-down list. Button  , located next to the drop-down list of responsible users allows you to notify several users of this task. Clicking on this button will open a window with all users from the contact list, where the user can mark the people he needs and press the "OK" button. As a result, this task will be available to selected users. , located next to the drop-down list of responsible users allows you to notify several users of this task. Clicking on this button will open a window with all users from the contact list, where the user can mark the people he needs and press the "OK" button. As a result, this task will be available to selected users. COMMENTARY ON THE PROBLEMIn the central part of the window, the user can enter his comment to the task. INVESTMENT OF DATA IN THE TASKUsing the buttons located on the bottom of the window, you can enclose various data into the task: "Attach file" - attach files of different formats. The file selection dialog box appears. The attached file can be deleted by using the corresponding item in the context menu on the file; "From the scanner" (Ctrl + S) - the ability to attach scanned data; "Data from the knowledge base" (Ctrl + J) - adds a comment to the task from the knowledge base; "Sound recording" (Ctrl + R) - sound recording attachment; "Attach document" - an attachment to the task of the document template; "From the buffer" (Ctrl + V) - insert text and images from the clipboard; "Copy" (Ctrl + C) - copy to the clipboard; "Cancel" (Ctrl + V) - undo the last performed actions. When you attach a file to a task or paste data from the clipboard, the "Files" tab appears in the task window. The tab displays all the files attached to the task. Next to the file name is its size. The attached file can be deleted by using the corresponding item in the context menu of the file (Del key). The size of each attached file (data) should not exceed 100 MB. 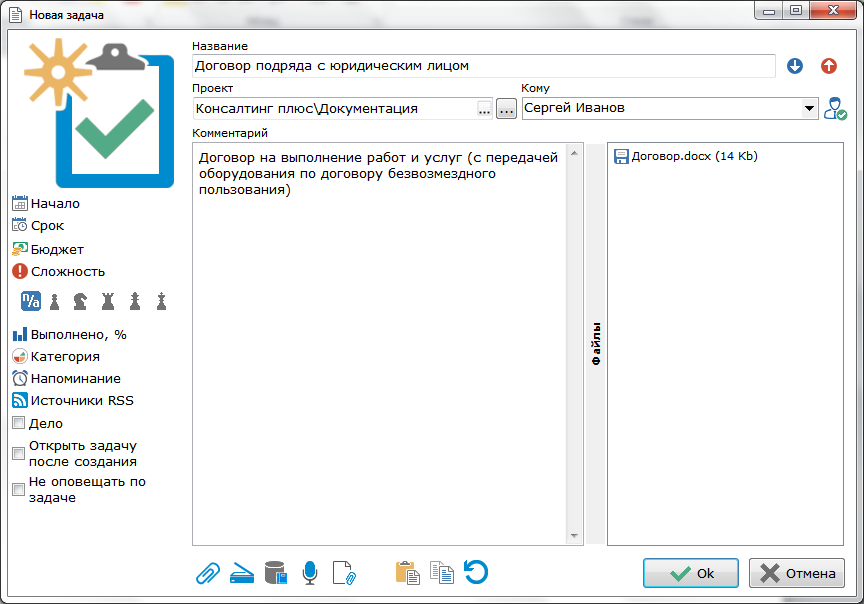 The following task properties are located in the left pane of the task window: BEGINNING AND TERM OF PERFORMANCE OF THE TASKFor the task, you can specify the time and date of the beginning and completion of the task, using the calendar to select the time and date of the beginning / completion of the task. 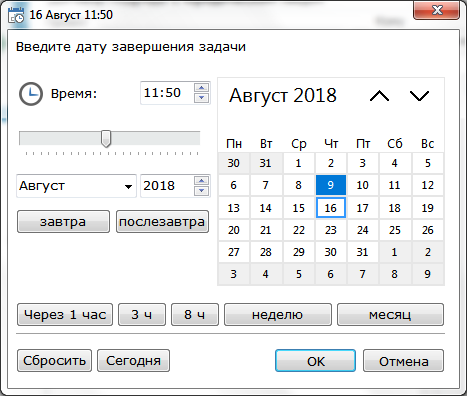 BUDGETThe user can specify the amount of the allocated budget for the task. COMPLEXITY OF THE TASKThe user can specify the complexity of the task, which takes the following values:  Complexity not defined Complexity not defined
 Easy task Duration 10 minutes Easy task Duration 10 minutes
 Average task Duration 30 minutes Average task Duration 30 minutes
 A fairly complex task Duration 1 hour A fairly complex task Duration 1 hour
 Difficult task Duration 4 hours Difficult task Duration 4 hours
 A very difficult task Duration 8 hours A very difficult task Duration 8 hours
The complexity of the problem can be estimated in time duration. Above the task complexity icons there is a field in which the task execution time is displayed depending on the degree of its complexity. DONEThe user can specify the percentage of task execution. CATEGORYThe user can assign a category to the comment. REMINDERYou can also set a reminder for the task. 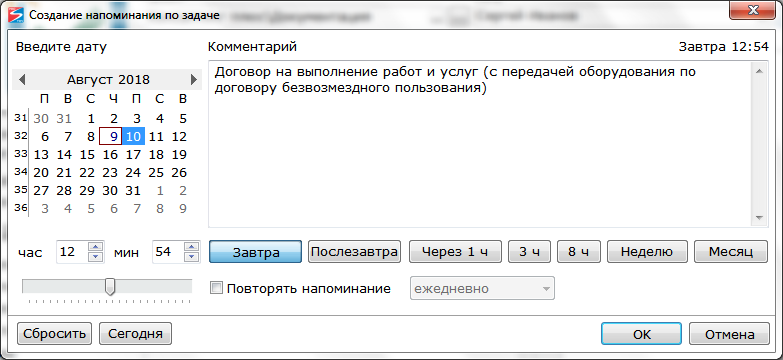 A BUSINESSConverts a comment into a file. OPEN THE TASKOpens the task window after its creation. You can disable the task notification by checking the "Do not notify by task" field.
|